
280 stories
·
1 follower

Type With Your Voice on Linux Using These Open Source Local AI Tools

1 Comment
a penguin is seen saying something into a microphone, sitting near a laptop

Typing is a fine way to write and a slow way to catch a thought. The most ground-breaking ideas show up while your hands are busy with a soldering iron, a sleeping cat, or a half-eaten taco.

Voice input apps overcome that problem because you talk, and it turns your speech into text.

Most of the apps in this list are open source, run on Linux, and drop the text into whichever window has focus. That could be a browser tab, a terminal window, or a notes app.

Because most of them can run the speech recognition locally on the machine, nothing you say gets sent anywhere.

📋
This list is not ranked; choose whichever suits your Linux setup.

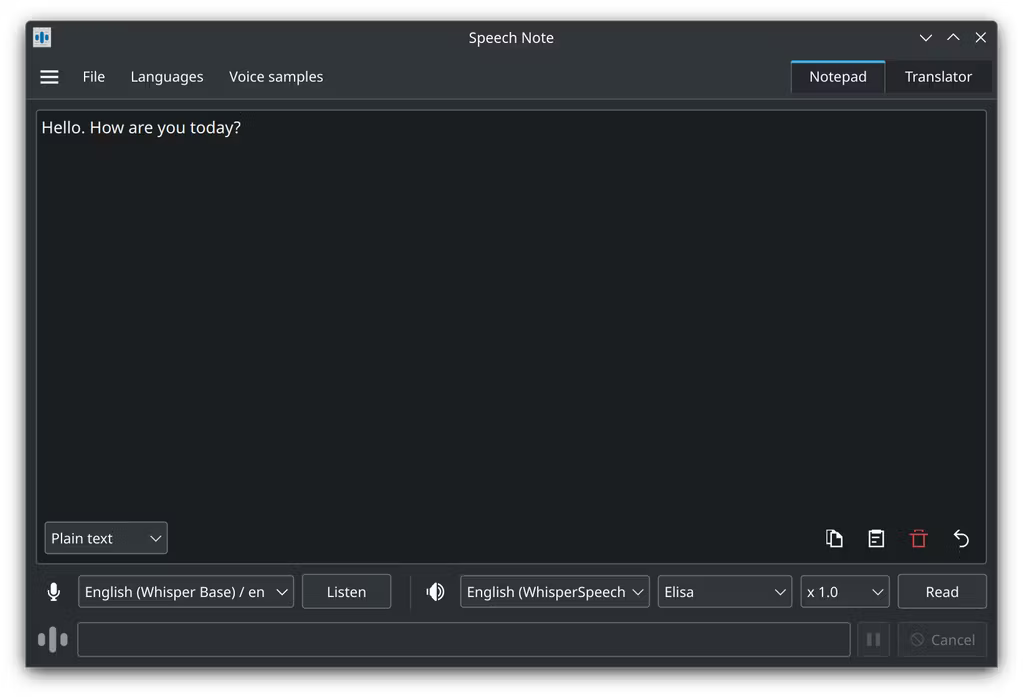
1. Speech Note

speech note
💭
Good to know: Typing into other windows works on X11 out of the box, and Wayland sessions need the ydotool daemon installed and running.

If you want dictation, reading aloud, and translation in one app, Speech Note covers all three. Your dictated text becomes a note that can be translated or read back to you.

You get a choice of recognition engines, including whisper.cpp with Parakeet, Vosk, and Faster Whisper. The language models for each engine are separate downloads that you pick from inside the app.

Dictating into other apps is also possible with a global shortcut or a command-line action starting the listening process. The text lands wherever the cursor is focused.

Speech Note is released under the Mozilla Public License 2.0 and can be installed from Flathub, the AUR, or openSUSE's Packman repository.

2. Myna
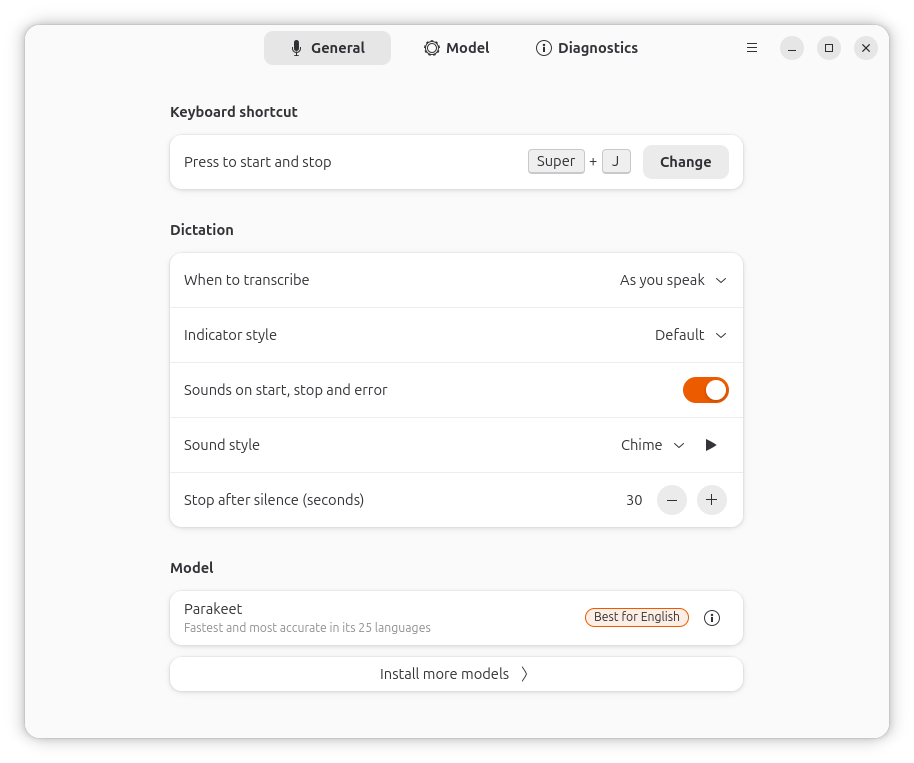
myna
💭
Good to know: Myna is under heavy development. Expect breaking changes before the stable release drops.

Myna is Canonical’s dictation app for Ubuntu Desktop, released under the AGPL-3.0-or-later license. Recognition runs locally, and the models are packaged as separate snaps for Whisper, Parakeet, FunASR, Nemotron, and IndicConformer.

Setup starts with a PPA and the myna-config package. Myna Settings then handles the rest, from installing the models and desktop components to binding the dictation key.

It supports Ubuntu with GNOME on Wayland from 24.04, Xubuntu 24.04 with Xfce on X11, and Kubuntu with KDE Plasma 6 on Wayland from 26.04.

The PPA 👇

sudo add-apt-repository ppa:canonical-desktop-team/myna
sudo apt install myna-config

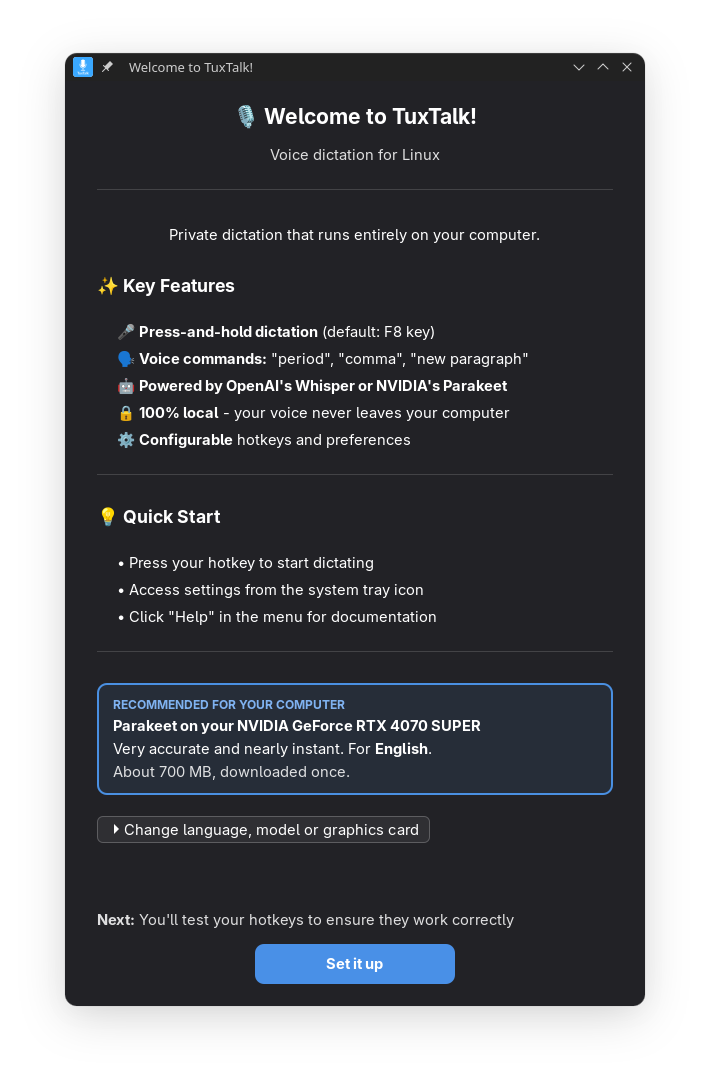
3. TuxTalk

💭
Good to know: No Flatpak package yet. If you're not on Arch, Debian, or Fedora and their derivatives, use the AppImage.

TuxTalk is a push-to-talk dictation app that was known as TalkType before its rename. Its lead developer uses Claude to write the code while they handle the testing themselves.

You hold F8 to talk or tap F9 to start and stop, and the transcript is typed wherever your cursor is. It covers X11 sessions as well as popular desktops like GNOME, KDE Plasma, COSMIC, Sway, and Hyprland.

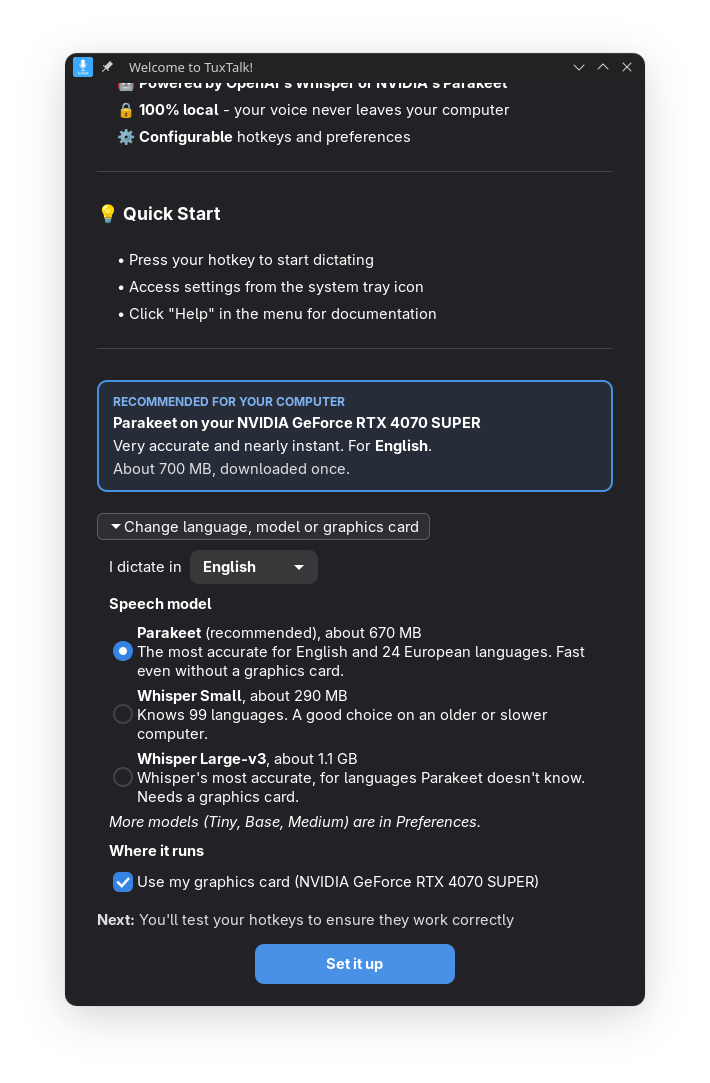
Whisper covers over 90 languages, while the default Parakeet model handles English and 20+ European ones. TuxTalk also understands spoken punctuation and email addresses.

It can be installed from the AUR, as a .deb or .rpm package, or as an AppImage, and the code is MIT-licensed.

4. Vocalinux
vocalinux
💭
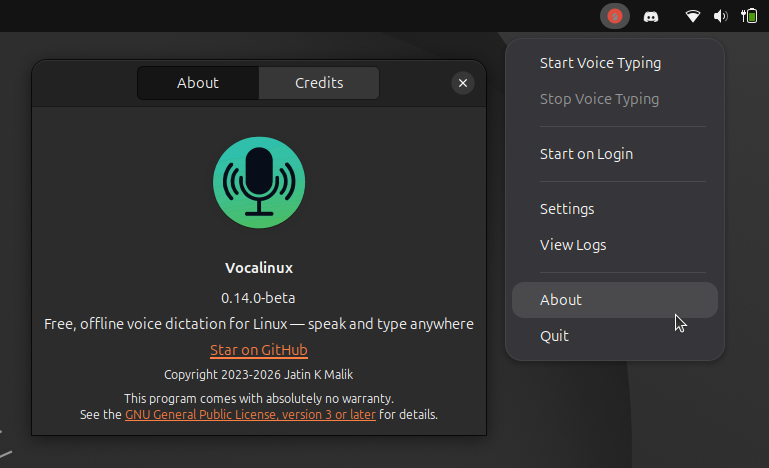
Good to know: You can use voice commands like "delete that" to remove the last sentence or say "capitalize" to capitalize the next word.

Vocalinux is a dictation app for X11 and Wayland, released under the AGPL-3.0 license, with a long list of ways to install it. There is an installer script, an AppImage, .deb and .rpm packages, a Flatpak, a Snap, an AUR package, a PyPI release, and a Nix flake.

After the model download, recognition runs locally on whisper.cpp by default, and you can switch to Whisper, Faster Whisper, VOSK, or Parakeet from the settings menu.

The project recommends using its interactive installer, which picks an engine for your hardware and downloads a default model of about 74 MB.

5. WhisPaste
whispaste
💭
Good to know: Add your own names and terms to the dictionary. WhisPaste fixes them after every dictation.

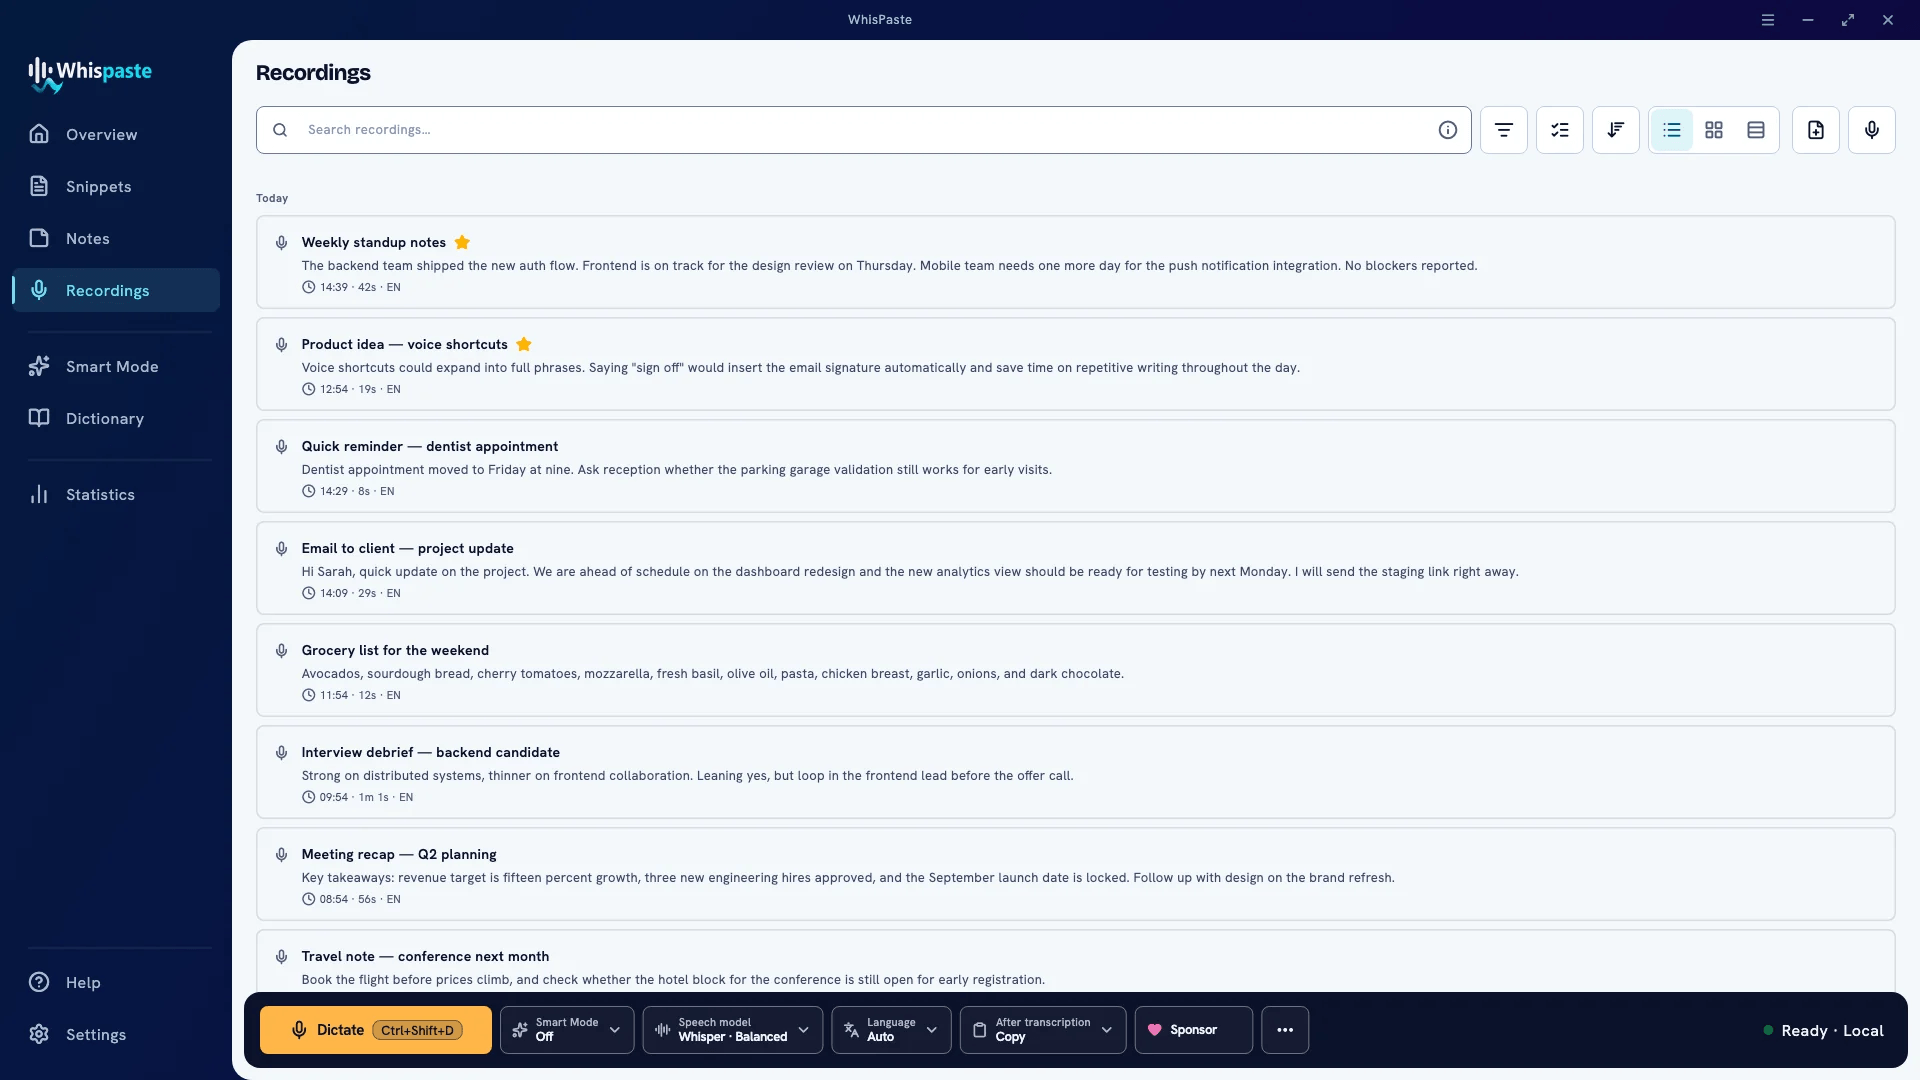
Everything in WhisPaste starts with one hotkey, Ctrl+Shift+D, that you hold to talk or tap to toggle. A small waveform overlay confirms the microphone is live, and the transcript is pasted into whichever app you are working in.

It is MIT-licensed and runs recognition locally through Whisper, with support for over 90 languages, or Parakeet, with about 25 languages supported. OpenAI and Deepgram are optional cloud providers, and no account is needed to use WhisPaste.

Each dictation is saved to a searchable history with tags and several export formats, including DOCX. You can also dictate into a notes page, and spoken trigger phrases expand into snippets or multi-field templates.

6. Hyprwhspr
hyprwhspr
💭
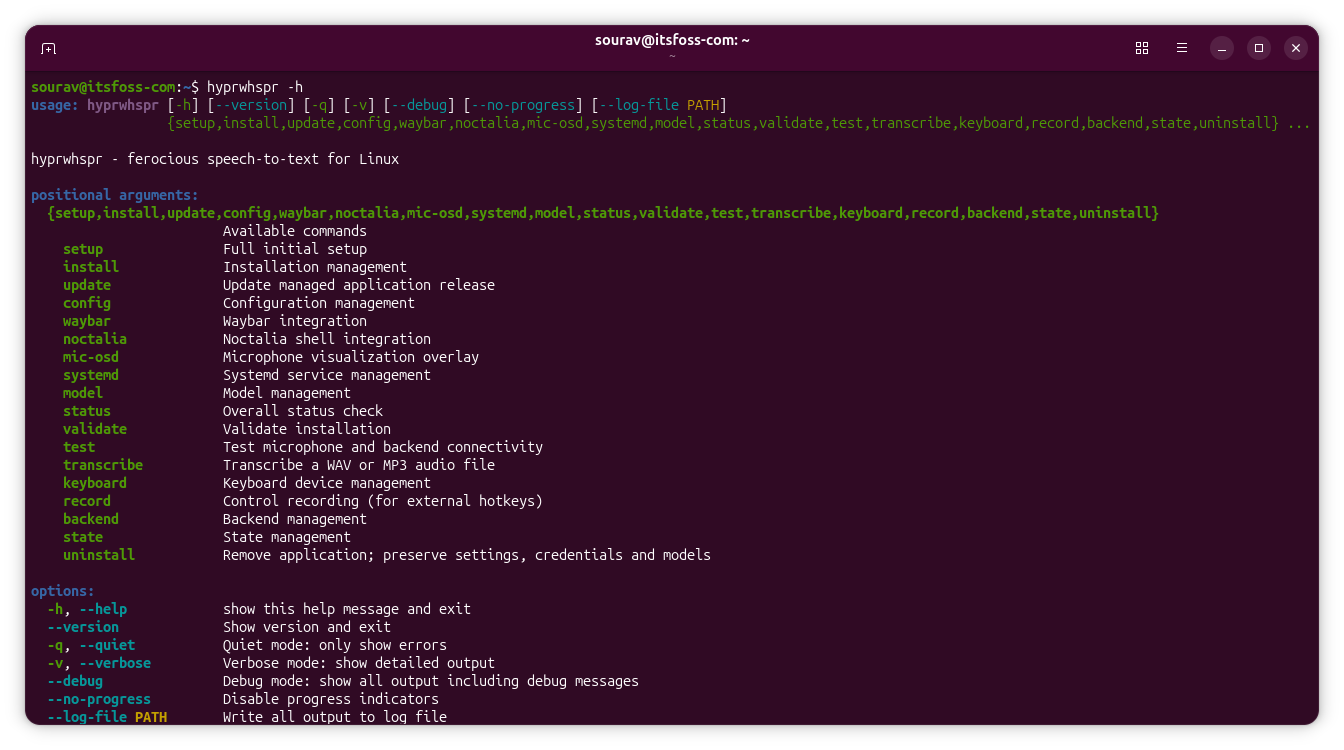
Good to know: Five recording modes are built in, ranging from toggle and push-to-talk to continuous and long-form with pause and save functions.

hyprwhspr treats dictation as something you can script. A command-line interface can start, stop, toggle, or cancel a recording from anywhere, and a post-transcription hook lets a command of your own handle each transcript before it reaches the window.

Recognition runs locally by default with Parakeet TDT V3, Cohere Transcribe, or any of the Whisper models, and onnx-asr is there for machines without a GPU.

It detects NVIDIA CUDA or AMD and Intel Vulkan on its own, falls back to the CPU, and can unload the model from VRAM without a service restart. Cloud providers such as Gemini, OpenAI, and ElevenLabs are also available.

7. Hex

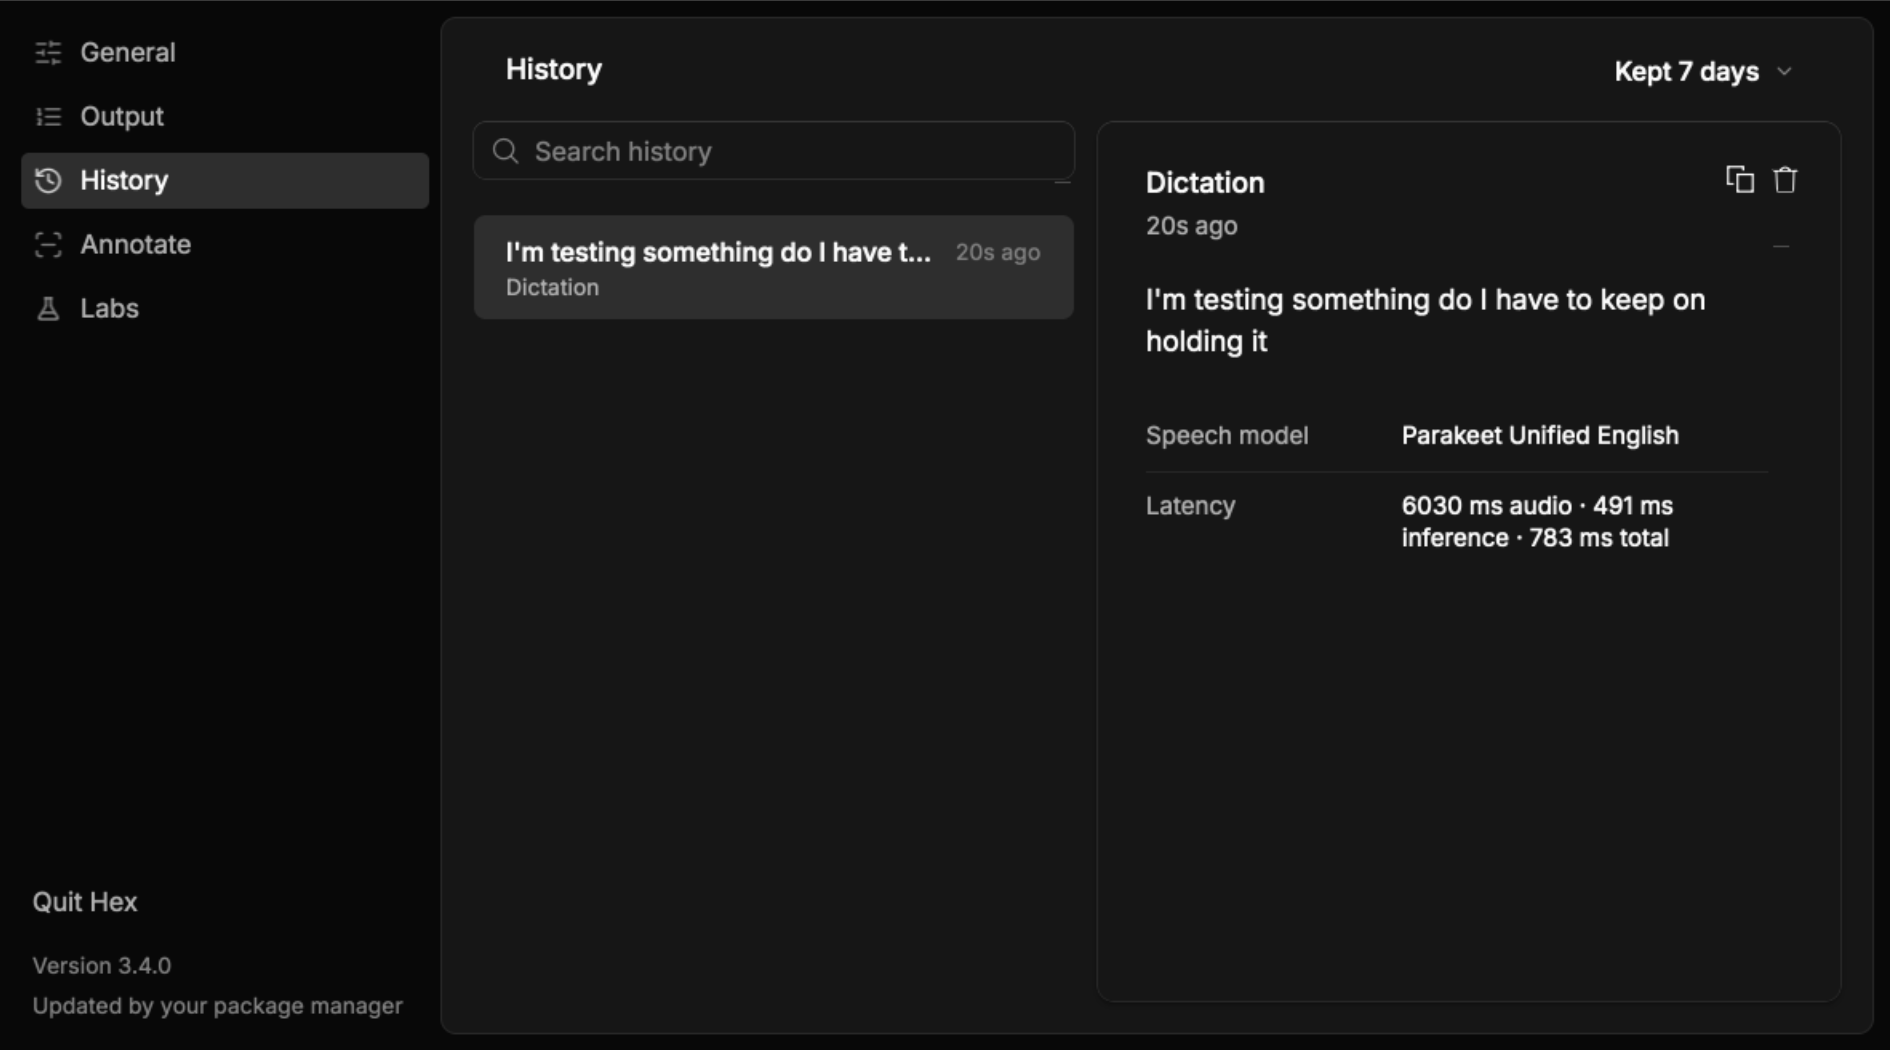
Another one in the list that lets you dictate to your Linux desktop with voice. Hex is open source, works with Parakeet for English language by default and also provides the option to download and use Cohere Transcribe and Whisper models.

This is more of a dictation tool, actually. It keeps a history of what you recorded. You can take notes or at least see what dictations you used earlier. All these things stay on your system, locally.
Hex voice dictation local AI tool
History also shows additional details and stats

What you last recorded, can be stored in the clipboard so that you can copy paste it easily, when needed. So unlike Myna, it is not entirely for voice-based input. It's for taking notes by dictation.

There is an option for adding your own vocabulary. Meaning, you can record unusual words, tell the model what it sounds like and what it should transcribe.

Hex also offers a screen recorder with voice annotation. I have not tried this feature yet, but this is something we will be covering on It's FOSS in detail.

Expect More

AI-assisted development has moved fast enough lately that a software category can look settled one month and crowded the next. Voice input on Linux is no exception, and new apps will keep showing up.

Some of those will take approaches that none of the picks above do. If one catches your eye before this list gets updated, do let me know in the comments below. 👇

Read the whole story
jhunorss
1 hour ago
reply
voice recording detailee
Share this story
Delete

Local AI Weekly #10: Say It, Don't Type It

1 Comment
Local AI

I have said it in the past and I am saying it again. Voice is going to be the preferred input method in the future, be it smartphones or desktop computers.

And Voice is one of the best cases for local AI. Speech models are small enough to run on an ordinary laptop. And your voice is about as personal as data gets. After all, you surely don't want every half-formed sentence you mutter going to someone else's server to train their AI.

🐧 Linux gets a voice (input)

Ubuntu 26.10 shipped Myna, Canonical's speech-to-text tool. You press a shortcut, speak, and the text appears in whatever app you're using.

It runs Parakeet, Whisper or FunASR locally and needs no internet once the model is downloaded.

Myna is not the only such tool. There are many other tools like Vocalinux and TuxTalk. Commercial tools like Superwhisper are also available for Linux but they are not really local.

Most dictation tools, from Myna to Superwhisper, do the same four things.

First, something decides when you're actually speaking and trims the silence. Then a speech model, usually Whisper or Parakeet, turns your audio into raw text. Some tools pass that text through a local LLM to fix punctuation, terms and formatting. Finally, the tool types the result into your active window.

The cleanup step is optional, and it isn't free. A second model means more RAM in use and a longer wait before your text appears. For short messages, raw Whisper output is often good enough.

🔍 Discover AI tools

WhisPaste 1.5 came out on 16 November. This MIT-licensed app transcribes on your machine with whisper.cpp or Parakeet, and cloud providers are optional. The new version can transcribe audio and video files locally too, from MP3 and FLAC to MKV and WebM. Your history and notes are now stored encrypted.

Koe is the one that does the LLM cleanup step locally. It's written in Rust and MIT-licensed. Speech goes through whisper.cpp, and the transcript is then tidied up by a model running in Ollama. The developer built it for writing Japanese on Ubuntu, but speech recognition covers any language Whisper does.

🧪 On my desk

I use Proton's ecosystem at It's FOSS. I use their email service for @itsfoss emails, their VPN, cloud storage and password manager. The entire Proton ecosystem is built on the privacy promise.

Proton also offers its own private AI called Lumo. Up until now, it was boring and wasn't of much use, it was just a chatbot, like what chatGPT was back in 2024.

But yesterday, Proton revamped Lumo with a desktop app and it now has the options for skills, connectors and accessing system files and shell.

And now it is actually useful. Your data stays private and yet you can use it for email triaging, GitHub management and several other tasks.

It still has a long way to go, but at least Proton has taken the step in the right direction.

🗂 AI jargon: VAD

VAD stands for voice activity detection. It's a tiny model that listens to your microphone and decides whether a sound is speech or just noise, your fan or the keyboard.

Dictation tools use it to cut silence before the audio reaches the speech model. Less audio means faster transcription. It also means Whisper doesn't get the chance to "hear" words in silence, which it's known to do. Silero VAD is the common choice, and Koe supports it.

⚡ Quick Tip

Most of these tools let you choose which Whisper model to download. Bigger isn't always better for dictation.

If you only dictate in English, pick a model ending in .en, like base.en or small.en. These English-only versions tend to be more accurate than the multilingual model of the same size, especially at the smaller sizes.

On a laptop without a good GPU, start with small.en and move up only if it keeps getting your words wrong. A model that's slow to respond will annoy you more than the occasional typo.

See you next week 🙂

Read the whole story
jhunorss
1 hour ago
reply
Voice recording
Share this story
Delete

The Much Awaited Linux Multi-Tool Flipper One is Now Available for Pre-order

1 Share
Flipper One Pre-Order Launch campaign

I own a Flipper Zero. It's a fun little device for anyone with a hacker mindset, the kind of gadget you poke at NFC tags, IR remotes and Sub-GHz signals with just to see what happens.

So when Flipper Devices first showed off the Flipper One, I expected it to be just a spec bump. It isn't one.

As we noted when the Flipper One was first announced, this is a pocket-sized Linux computer that also happens to be a serious network tool. In short, it's a lot more capable device than its predecessor.

And now it's official. The Flipper One Kickstarter campaign is live now, priced at $399. That's double what a Flipper Zero costs, and you can blame the steep increase on the chip shortage in this age of AI.

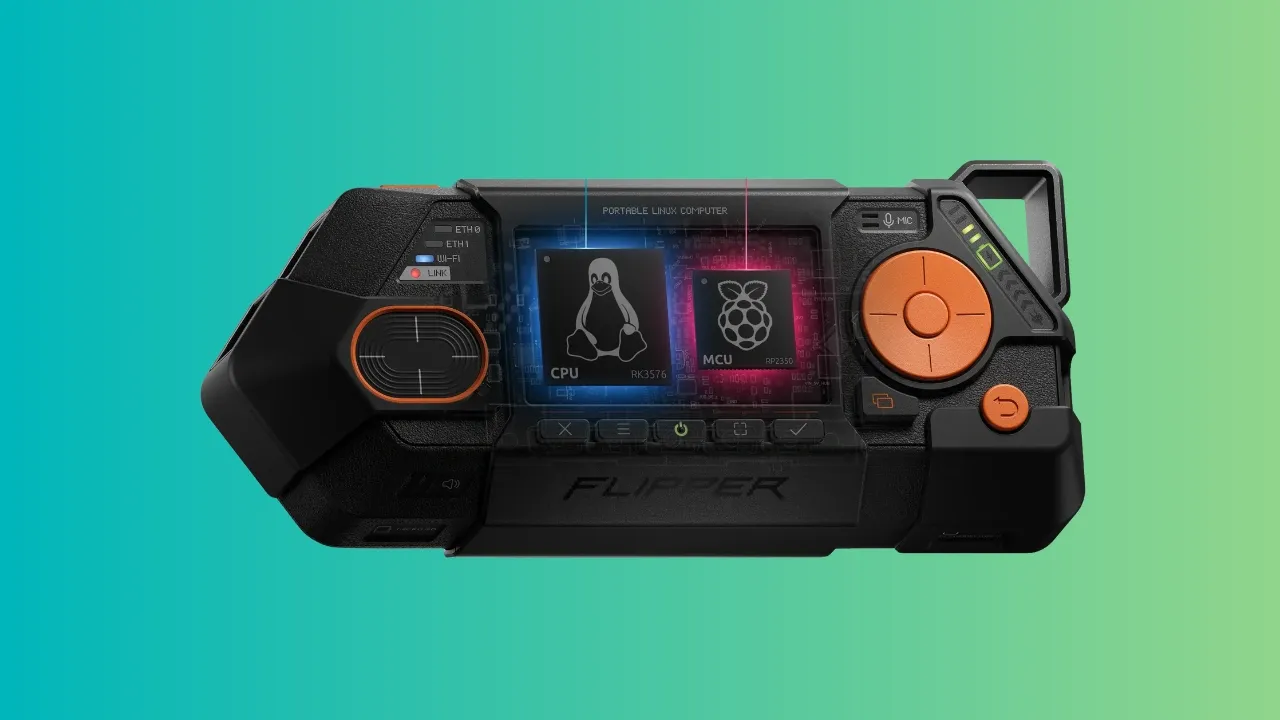
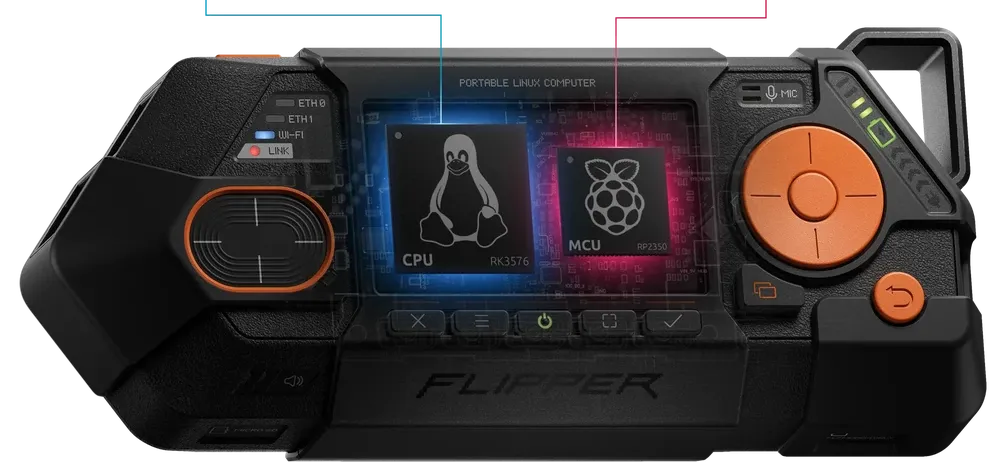
Flipper One cutaway illustration showing the Rockchip RK3576 CPU and Raspberry Pi RP2350 microcontroller

Key Specifications

  • Price: $399 (Kickstarter)
  • SoC: Rockchip RK3576 (8 cores) + Raspberry Pi RP2350 co-processor
  • Memory/storage: 8 GB LPDDR5 RAM, 64 GB UFS
  • Connectivity: Wi-Fi 6E, Gigabit Ethernet, built-in eSIM
  • Expansion: M.2 and GPIO modules (5G, LoRa, SDR)
  • Estimated shipping: July 2027

The Flipper One costs $399 on Kickstarter. Folks who bought the $20 pre-order coupon earlier were promised a $379 price.

Flipper One

Flipper Devices is also clear on the fact that this is not a successor to the Flipper Zero. The Zero works offline, interacting directly with physical stuff like NFC, RFID, infrared and Sub-GHz radio. Flipper One moves up the stack into networked computing: high-speed connectivity, data processing and real on-device compute.

Under the hood, it uses a dual-processor setup. The Rockchip RK3576 octa-core chip runs Linux, networking, USB 3 and video output. A low-power Raspberry Pi RP2350 handles the small 256x144 grayscale display, buttons and power. That means the screen and buttons keep working even when the main Linux OS is not used.

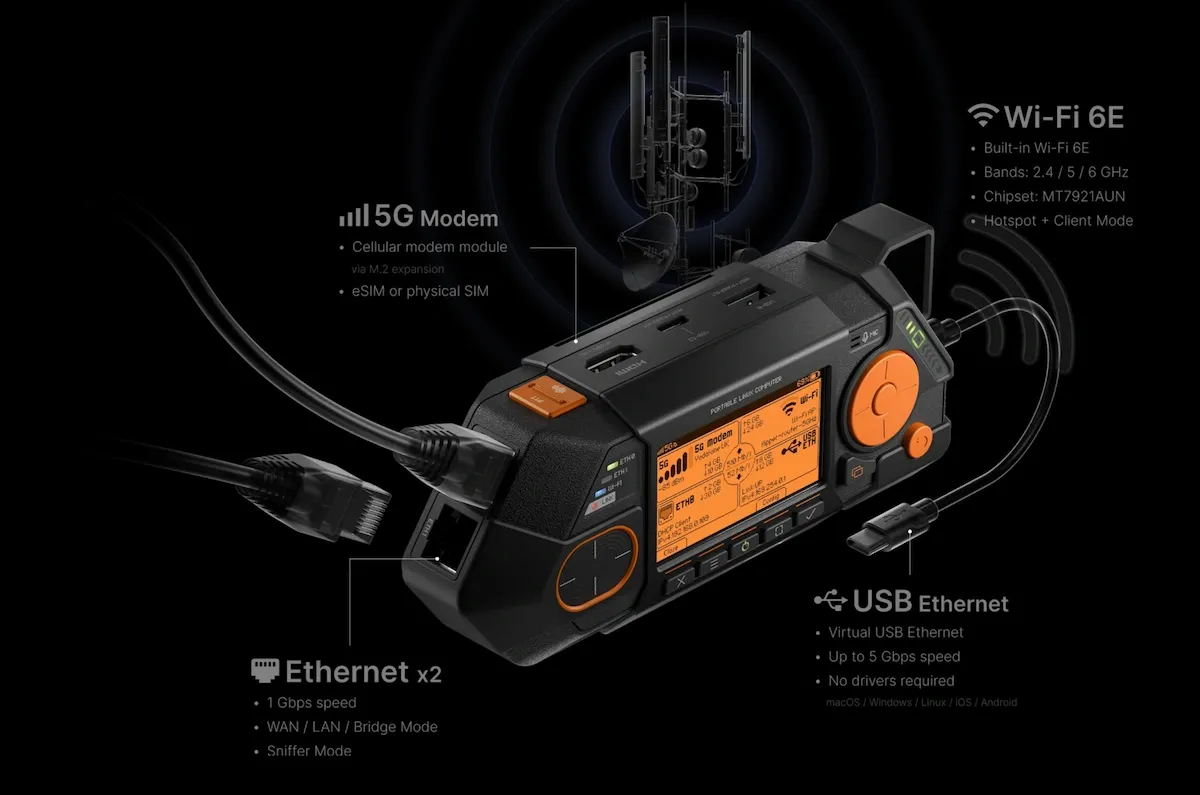
The networking side is where things get interesting. It can juggle up to five uplinks, act as a hotspot, run VPNs and firewalls, scan wired and wireless networks, and analyze Wi-Fi traffic. The built-in eSIM comes with a Flipper SIM data plan.

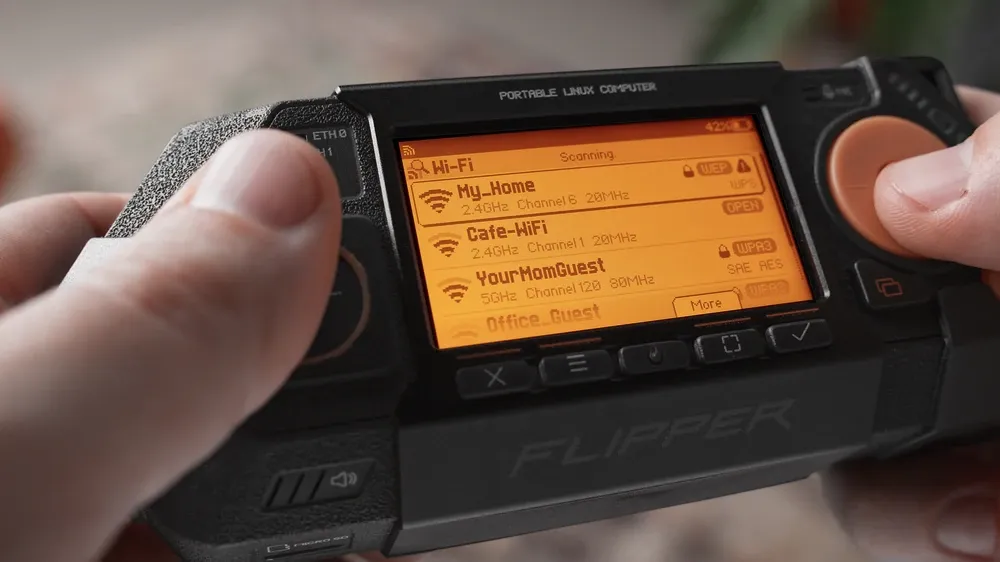
Flipper One displaying a list of nearby Wi-Fi networks

It also doubles as a battery monitor, keeping tabs on its own power and whatever you plug into it.

Plug it into a monitor over USB-C DisplayPort Alt Mode and it becomes a desktop computer. Or hook it up to a TV and use it as a media box. It is a versatile device.

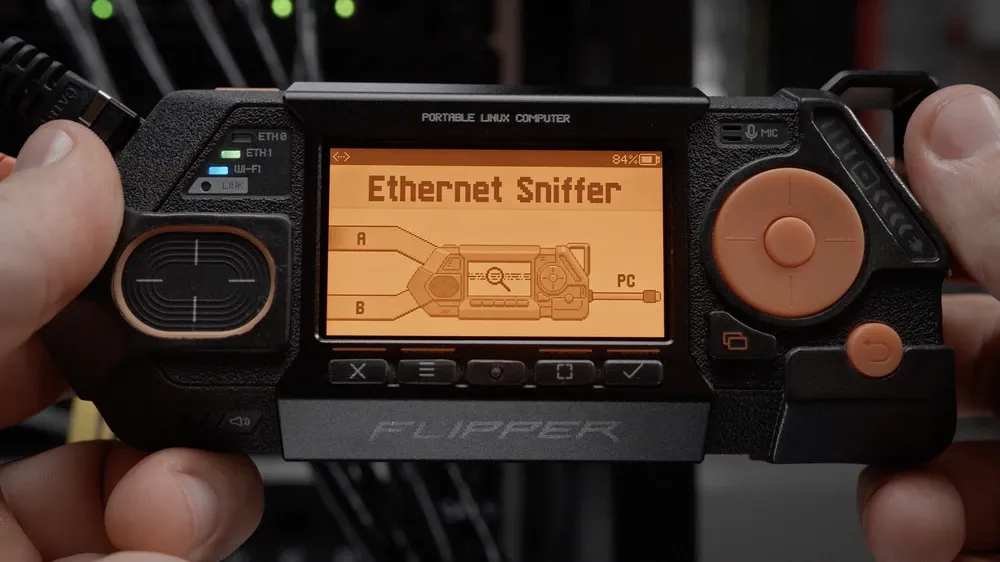
Flipper One displaying its Ethernet Sniffer interface

Flipper OS and the mainline kernel

I like the fact that they have put in effort for a custom OS called Flipper OS, a Debian-based system where you switch between preconfigured profiles for different jobs: network router, radio lab, desktop, TV media box.

Each profile has its own settings, kernel and apps. You pick one from a boot menu before Linux even loads. Your changes live in an overlay layer, so you can wipe a profile back to default if you mess it up. Experiment freely, as they say.

Flipper Devices has also partnered with Collabora to get the RK3576 into the mainline Linux kernel. The device already runs on mainline, and the DisplayPort Alt Mode patches are under review. The goal is an ARM computer with no binary blobs. Anyone who has fought with a vendor BSP on an ARM board will appreciate that.

There's still some work left. The team is working on dynamic memory frequency scaling for better power efficiency, and on removing the few closed-source bits remaining in the boot process. All of this is in public knowledge, available on the Flipper Developer Portal.

$399 price tag with no profit margin!

The global RAM shortage has made memory prices volatile (or should I say hostile). Flipper says RAM and UFS storage now account for more than half of the total hardware cost of the Flipper One.

Instead of waiting or raising the price, they are selling the hardware at cost and betting on the community to fund the first production run. Bold move, or a sign of how bad memory pricing has gotten? Probably both.

The track record helps. Flipper Zero raised $4.8 million on Kickstarter, hit its goal in eight minutes, and the company has sold over a million devices since 2020.

Pre-order is open now

The Flipper One Kickstarter campaign runs from November 17 to December 17, 2026. You can back the campaign on Kickstarter.

The device costs $399, and the box includes the Flipper One and a USB-C cable. Estimated shipping is July 2027.

As with any crowdfunding campaign, treat the timeline as an estimate. Back it because you want to support the project, not because you're counting on the ship date.

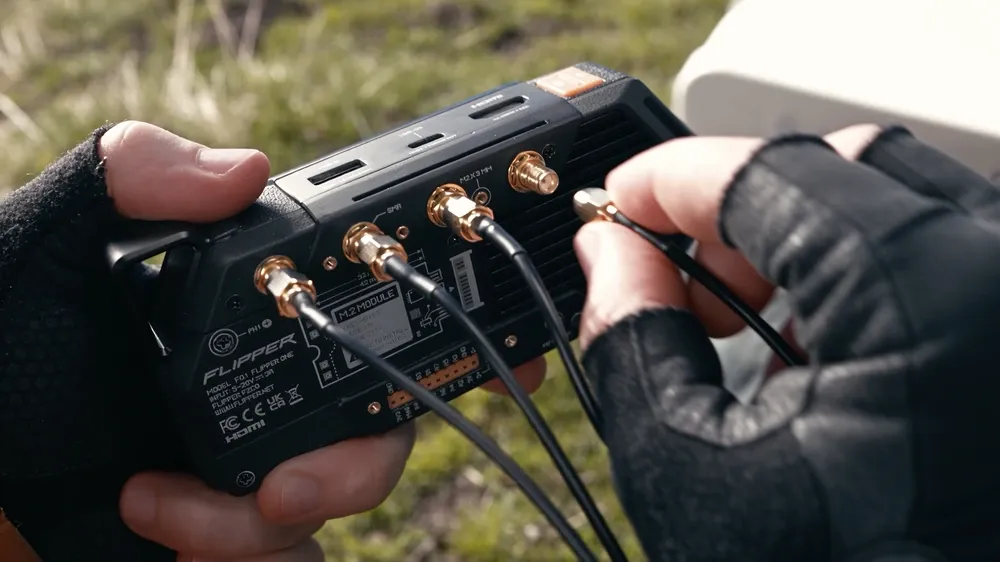
Connecting an antenna cable to the SMA ports on the back of a Flipper One

Three expansion modules are also available through the campaign:

  • LoRa module: works with Meshtastic, MeshCore and Reticulum mesh networks, and doubles as a walkie-talkie.
  • 5G modem: an M.2 module that replaces the back cover, with four SMA antenna ports and support for both the built-in eSIM and external SIM cards.
  • SDR module: a software-defined radio module, full specs to be announced later.

The modules cost extra.

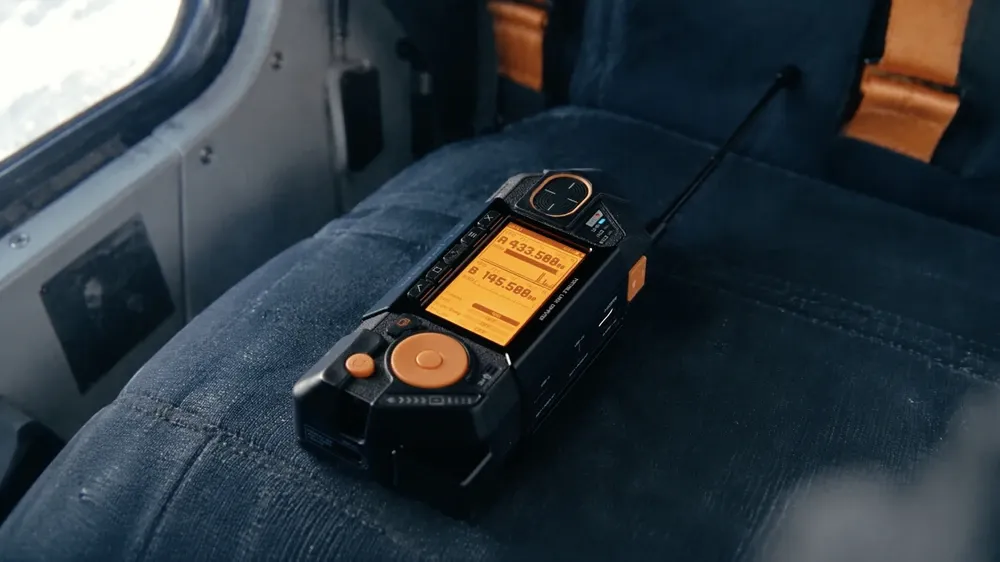
Flipper One with an antenna resting on a vehicle seat

As an owner of Flipper Zero, I am excited for Flipper One launch. In normal times, this would have been a sub $200 device but we live in the times where hobbyist gadgets are getting expensive because Big Tech has disrupted the supply chain for their AI obsession.

Read the whole story
jhunorss
1 hour ago
reply
Share this story
Delete

Install Hindsight Agent Memory Locally with Ollama

1 Comment

I wanted to know whether Hindsight is real software or a thin wrapper around a vector store. The agent memory server from Vectorize went from about 20,000 GitHub stars in mid-August to more than 52,000 this week, and that kind of growth makes me suspicious. It is not a wrapper. Hindsight agent memory ships its...

Read the full article at computingforgeeks.com

Read the whole story
jhunorss
2 days ago
reply
I didn't know about memory systems. Promising tools. The article is Claude written, though.
Share this story
Delete

Ziggity is a Helpful Tool for Power Users Who Still Use Git Manually

1 Share
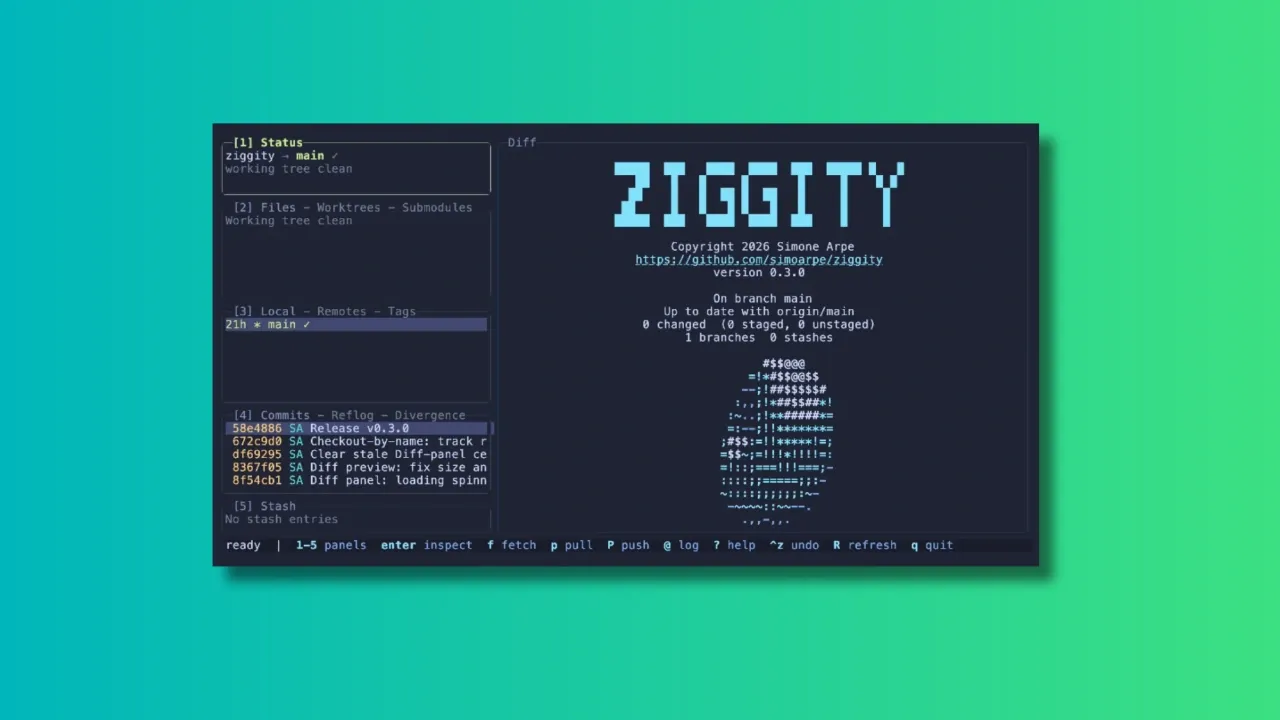
Ziggity git client

In the age when people are not even looking at the code generated by AI, I am reviewing a terminal-based client that gives full visibility and control over your git repositories. Because not everyone has handed over all the critical thinking to AI, I presume.

Over the years, many Git clients, both GUI and TUI, have emerged to make working with repositories easier. Tools like lazygit have become popular among terminal users, and Ziggity is another addition to the world of terminal-based Git interfaces.

What Makes Ziggity Special?

Let me show you some of the main features of Ziggity.

Ziggity Is Small and Quick to Launch

One of Ziggity's main selling points is its lightweight design. It compiles into a single static binary, and the footprint stays small by design rather than by tuning.

The project also leans entirely on the Git installation already on your system instead of bundling something like libgit2, which keeps the binary itself down to a couple of megabytes. The project's own benchmarks, run on a Mac against lazygit, put Ziggity's process startup at a few milliseconds against tens of milliseconds for lazygit, with a noticeably smaller resident memory footprint once things settle.

Of course, benchmark numbers will vary depending on your hardware, your repository size, and the machine's other workload at the time.

Git Operations Don't Get in Your Way

Speed at launch is one thing, but a responsive interface while you actually work matters just as much.

Ziggity handles potentially slow operations such as fetching, pulling and pushing away from the main interface. This means you can continue browsing your repository, checking diffs, or reviewing commits while the operation runs quietly in the background.

A spinner in the Status panel is the only indication that something is happening, and a short one-line summary appears once the task wraps up. If it fails, that's when you actually get interrupted with a dialog.

The same philosophy carries over to longer, multi-step operations such as merges, rebases, autosquash, bisect sessions, and applying patches. Rather than dropping you back into a raw terminal and asking you to press a key to "return" to the app, something anyone who has used git clients will recognize, Ziggity simply keeps its interface up the whole time.

Even authentication is handled without leaving the app. If a push over HTTPS needs a username and token, Ziggity opens an in-app prompt, masks the token as you type, and retries the operation once you're done. There's no dropping to an external credential helper, and if a saved keychain is configured, it's reused automatically the next time around.

First-Class Mouse Support

Terminal applications are usually associated with keyboard-only workflows, and Ziggity absolutely supports that. But if you are more comfortable with mouse, you can very well use it.

You can click on any panel to focus it, click a row to select it, and use the scroll wheel across lists, diffs, dialogs, and even the commit graph. In the staging view, you can click directly on a line and stage just that line with a keypress.

Ziggity also supports proper text selection. Click and drag over a diff, a commit, or any other panel, and the selected text lands straight on your clipboard, with color codes stripped out and indentation preserved. This even works over SSH, since it relies on the OSC 52 clipboard mechanism rather than anything terminal-local.

A Better Way to Look at Git Diffs

Diffs are where you spend a good chunk of your time reviewing changes, so a clear way to read them matters.

Ziggity supports comparing branches and commits with a single keystroke.

The diff view also does word-level highlighting. Instead of painting an entire changed line red or green, Ziggity picks out the specific words that changed within a line, so a one-character edit in a long line doesn't get buried.

For long lines, think Markdown or documentation files, you can toggle soft wrapping on demand instead of having to scroll horizontally. The word-level highlighting keeps working correctly even once a line wraps across rows.

History Navigation That Understands What You Want

The commit graph is a real rendering of git log --graph, in git's own colors, and it loads without freezing the interface. By default it shows your current branch and its upstream so you immediately see what's incoming, and there's a shortcut to widen it to every branch or jump straight back to HEAD.

There's also a dedicated Divergence view that separates your outgoing commits from incoming ones relative to upstream, and history-editing actions are deliberately disabled there so you can't accidentally try to rewrite commits you haven't even pulled yet. Commit hashes are color-coded by push state, so commits that haven't left your machine, and are therefore safe to rewrite, stand out at a glance.

A More Flexible Way to Stage Changes

Staging changes is a routine part of the Git workflow, and Ziggity gives you a few ways to handle it without overcomplicating things.

You can work directly from the staging view and use the mouse to select individual lines before staging them, which gives you finer control when a file contains several unrelated changes that shouldn't land in the same commit.

It's a small feature, but a genuinely useful one if you care about keeping commits focused rather than staging an entire file at once.

Checkout by Name, Without the Detached HEAD Surprise

Press the checkout shortcut, start typing any ref, and pick from live suggestions.

If you type the name of a remote branch, Ziggity checks it out with tracking set up automatically, landing you on a proper local branch rather than a detached HEAD. Existing local branches switch normally, and tags or commits detach, because that's the only thing that makes sense for them.

This is a small but real usability improvement over some other terminal Git clients, where typing a remote branch name in the checkout prompt can leave you in a detached state with no local branch created.

Writing Commit Messages Gets Some Extra Help

Ziggity puts real thought into the commit message experience. Its built-in editor nudges you toward the 50/72 commit message convention with live, configurable limits, and it supports prepare-commit-msg hooks including hooks that derive a ticket number from your branch name.

There's also optional AI-assisted commit message generation from your staged changes. Rather than locking you into one provider, Ziggity calls out to a configurable external command, so you can point it at whatever model or subscription you already use.

Installing Ziggity

Ziggity is easily installable via Homebrew. If you have Homebrew set up on your system, use the command below to install it:

brew install simoarpe/ziggity/ziggity

Other than that, Ziggity offers prebuilt binaries for several architectures. You can download the appropriate binary from the official GitHub releases page.

Extract and copy the binary to a folder that is in your PATH. You can then run Ziggity from the terminal using the command:

ziggity

Wrapping Up

Terminal-based Git clients are not new, and there are already some excellent options available for those who prefer managing repositories without leaving the command line.

Ziggity enters this space with a focus on staying lightweight, staying out of your way during slow operations, and getting small usability details like checkout behavior and force pushes right.

The project is still a relatively new addition to the TUI Git client space, but it already offers a solid set of features. Whether it can replace an established tool like lazygit will ultimately depend on your workflow and the features you rely on.

Have you tried Ziggity yet? Or do you already have a favorite Git client for the terminal? Let us know your thoughts in the comments.

Read the whole story
jhunorss
3 days ago
reply
Share this story
Delete

Hide your slop PR descriptions behind

1 Share

Most of the changes I make to my projects these days come in the form of PRs opened for me by Claude Code or Codex. The PR is my unit of work - I use them to bundle commits together, iterating on them until a feature is complete, document decisions and then merge the finished result. Today's coding agents are great at writing PR descriptions.

They're too good at describing the work

The problem is that they are too good. An agent-written PR description is accurate and comprehensive. It describes the problem, the detailed solution, and the steps taken to verify it. That's a lot of information to absorb.

It's not necessarily slop, but it reads like slop!

It's very easy to spot an AI-written PR, and as with other forms of AI writing my instant reaction is best summarized as "I'm not reading all of that". It doesn't matter how accurate or useful the information is, I'm instantly put off by the thought that it will take me longer to read than it took the driving author to write... even when that driving author is me!

I want human editorial judgement. I want someone to have thought just long enough about the PR to give me a human-approved introduction that helps me understand, at a high level, what the PR is for and whether it deserves more of my attention.

I think I've found a low-effort way to do this that feels right.

Hide most of it in a details/summary

The HTML <details><summary> elements render as a collapsed heading (the summary) that can be expanded to view the larger piece of text. The code looks like this:

<details>
  <summary>Claude Opus 5.5</summary>
  <h2>The hook</h2>
  Plugins implement <code>register_agent_reference_types(datasette)</code>...
</details>

When rendered, it looks like this:

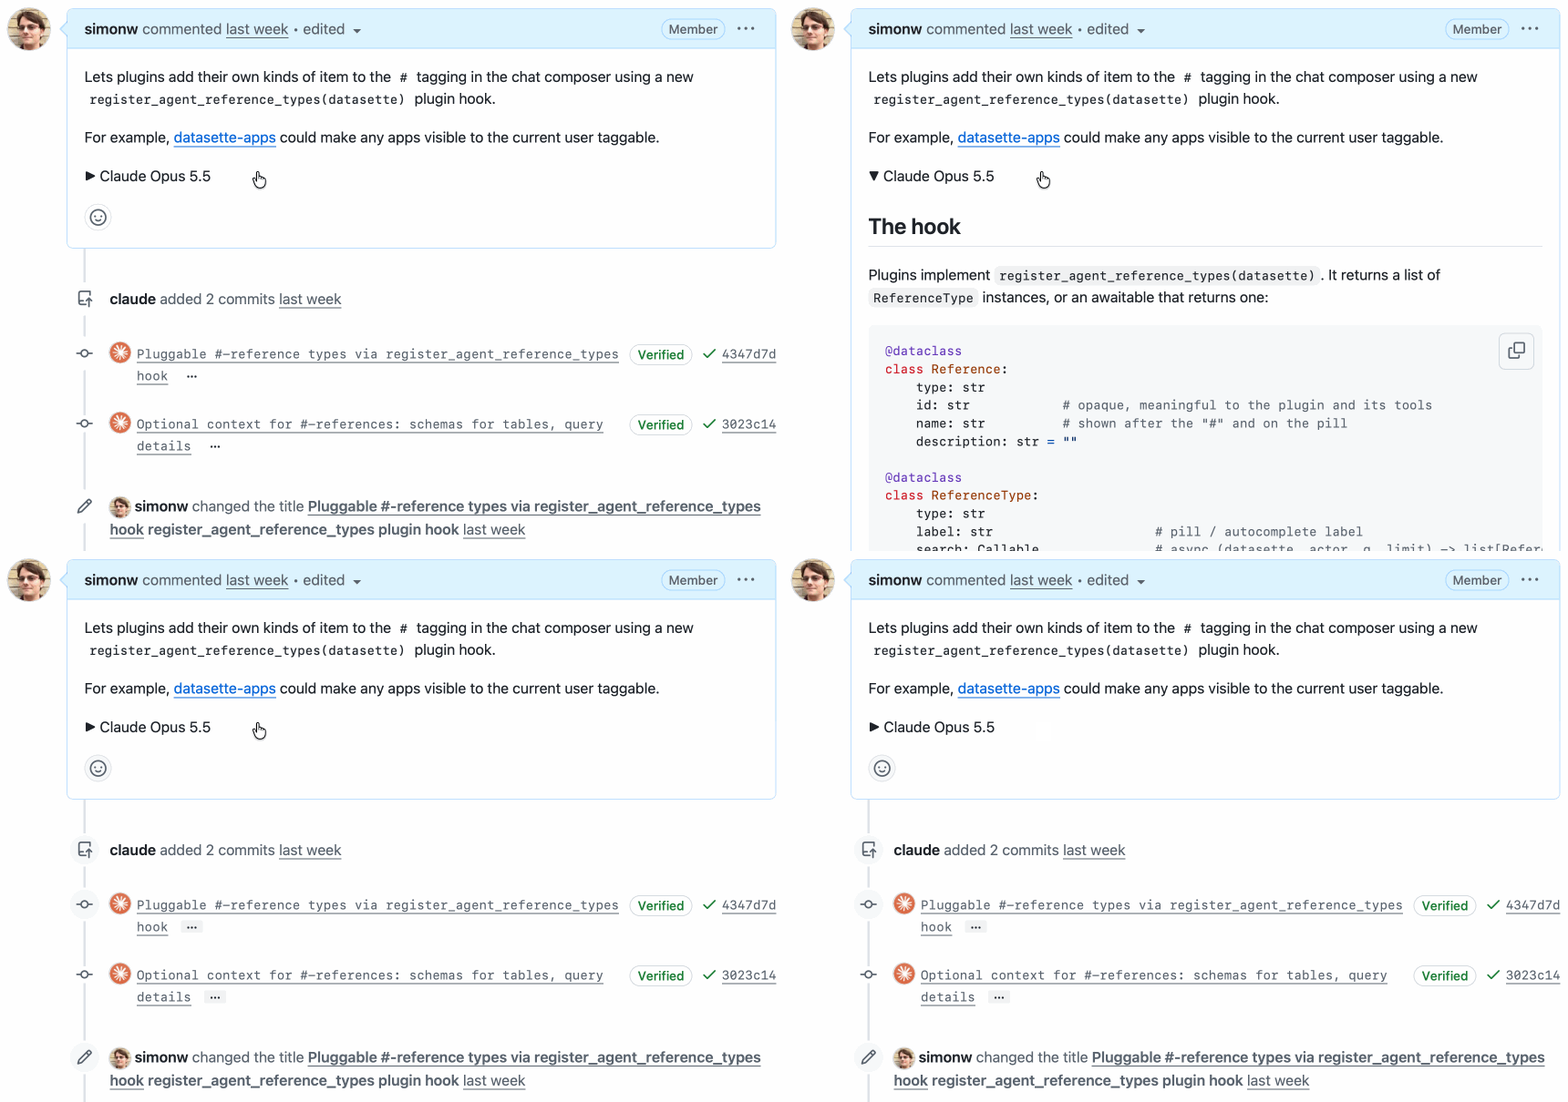
Screenshot of a GitHub PR. The text "Claude Opus 5.5" sits next to a little black arrow. Clicking on that text expands a full description inside the PR body.

Crucially, <details><summary> is supported in GitHub Markdown. You can drop those tags directly into an issue comment or PR description and GitHub will hide the details and display just the summary plus an expansion arrow.

I've started using this for my AI-generated pull requests.

The opening paragraph of my PRs will be carefully selected to act as a high-level explanation of what's going on - the shortest text a human can read that will help get them up to speed.

I'll sometimes throw in a screenshot as well, since images are often the best way to quickly illustrate a new feature.

The full agent-written essay then follows in a <details><summary>. I use the model name and often the effort level as that summary, to make it abundantly clear what is going on - "Claude Opus 5.5 Medium" for example.

My PRs don't feel nearly as sloppy now! The information is all still there, but a reader can glance at it and get the top, human-curated information without their eyes glazing over at multiple paragraphs of agent-written details.

I don't always write the introduction myself - sometimes the agent has given me what I need already, hidden away in the avalanche of other text. My promise to the reader is that the short opener will represent my human judgement as to what is definitely worth their time.

Here are some recent examples where I've used this pattern, including the opener I used:

The mnemonic

I used to have trouble remembering the order of the tags - is it <details><summary> or <summary><details>?

Here are two tricks that helped me.

First, and most obviously, the <summary> is clearly the bit where you summarize the details. That's the tag for your line of text that can be clicked to expand - the <details> element must then wrap everything else.

An even better trick is to always refer to these two tags as "details-summary".

"details-summary" is two syllables followed by three syllables. That rolls off the tongue more smoothly than the three-two punch of "summary-details".

Say "details-summary" out loud just a few times and you'll never forget the order of the tags again.

(I still wish GitHub would add a button to their Markdown editor for this - partly to save me painstakingly typing it on my mobile keyboard, and partly to help spread the word to more GitHub users that this feature exists.)

Tags: github, html, markdown, ai, datasette, generative-ai, llms, ai-assisted-programming, llm, coding-agents

Read the whole story
jhunorss
5 days ago
reply
Share this story
Delete
Next Page of Stories